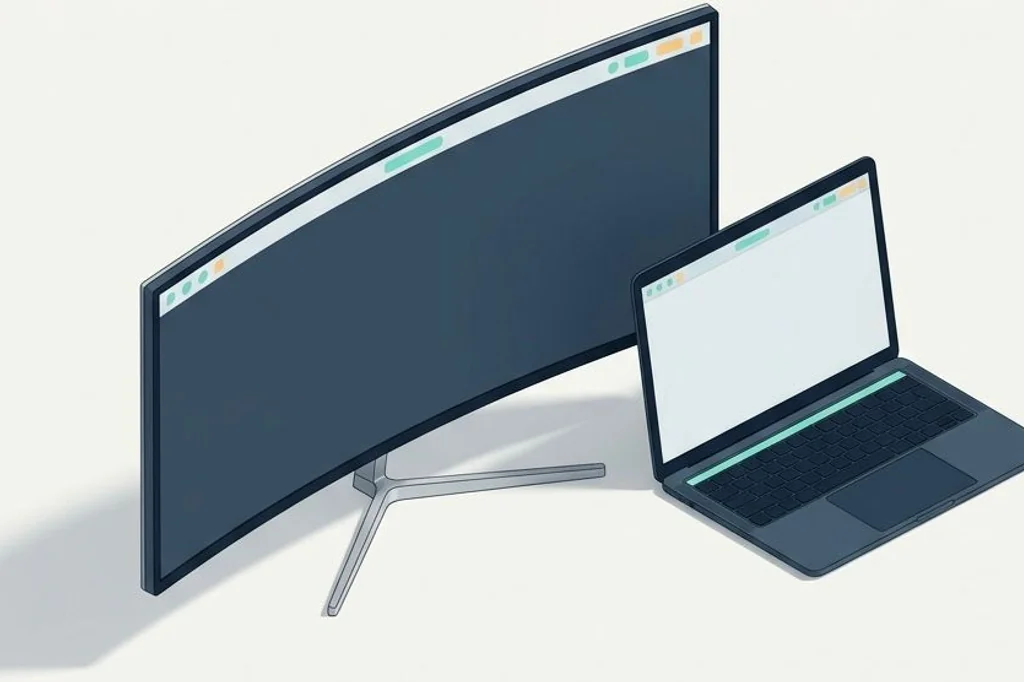
Modern professionals rarely work on a single display form factor. In the morning, you might sit at an office desk plugged into a colossal thirty-four-inch curved ultrawide monitor. In the afternoon, you unplug a single cable, tuck your laptop into a bag, and finish your day working from a compact thirteen-inch screen in a transit lounge or cafe. Yet these two hardware environments present opposing visual challenges: compact laptop screens suffer from physical camera notches that cut off overflowing icons, while ultrawide screens place status indicators so far into your peripheral periphery that checking the time requires turning your entire head. Focusing on designing a zero clutter menu bar for ultrawide and laptop screens establishes visual harmony and ergonomic comfort across every screen you use.
Key Takeaways
Here are the fundamental rules for designing a balanced menu bar across multiple screen types:
- A compact laptop screen is like a cozy student desk with a lamp post in the middle, while an ultrawide monitor is like an expansive soccer field.
- Checking status icons on thirty-four-inch ultrawide monitors creates physical neck strain if indicators are pinned to extreme edges.
- Collapsing unnecessary icons into a unified drawer ensures that plugging into or unplugging from external displays never scrambles your layout.
- Keyboard-triggered pop-over menus allow you to inspect tools right at your active mouse cursor rather than turning your head.
The Student Desk vs Soccer Field Metaphor
To grasp why one screen layout rarely fits all displays, consider the physical difference between two workspaces.
Working on a portable laptop screen is like working at a compact wooden student desk in a library study carrel. The surface is narrow, and right in the middle of the upper edge sits a fixed architectural lamp post (the camera notch). If you line up twenty different pens and calculators across the top ledge, half of them end up hidden behind the post. Space is at a severe premium. For laptop setups, reviewing our strategies on collapsible menu bar managers for notch screen macbooks shows how to keep tools accessible without edge clipping.
An ultrawide monitor, by contrast, is like sitting in the center of an expansive soccer field. You have immense horizontal space stretching five feet across your vision. But if you place your drinking water bottle on the far left goal line and your wristwatch on the far right corner flag, checking the time forces you to turn your head forty-five degrees away from your work. Repeating that neck twist sixty times an hour causes physical tension in your neck and upper spine. Adhering to practical digital efficiency principles means organizing your screen geometry to support natural human posture.
The Friction of Multi-Display Transitions
The most frustrating aspect of switching between laptop screens and external monitors is icon scrambling. When you connect a high-resolution external display, macOS adjusts its desktop geometry. Icons that fit comfortably on your wide screen suddenly get squished together when you disconnect the cable, overflowing behind the laptop camera notch.
Apple allows detailed display arrangement and scaling in their official Apple macOS displays settings documentation. However, maintaining screen sanity requires eliminating the clutter before the operating system is forced to rearrange it. By adopting the three icon rule for a distraction free macos top bar, you reduce your persistent top bar footprint to barely one hundred pixels. That tiny footprint fits effortlessly on a thirteen-inch laptop and looks clean and elegant on a forty-inch curved display.
Architectural Comparison: Laptop vs Ultrawide Screen Demands
Comparing the mechanical constraints of compact portable screens against sprawling ultrawide monitors illustrates how a zero-clutter philosophy solves both problems simultaneously.
| Display Environment | Primary Physical Constraint | Visual Hazard | Minimalist Architecture Solution |
|---|---|---|---|
| Compact Laptop (13″–16″) | Narrow horizontal width + physical camera notch | Icons swallowed behind notch; menu collisions | Collapse utilities into hidden drawer; keep 3 core icons |
| Standard Desktop (24″–27″) | Balanced aspect ratio (16:9) | Moderate visual drift to corners | Consolidate monitors into unified tray |
| Curved Ultrawide (34″–49″) | Extreme panoramic horizontal span (21:9 or 32:9) | Physical neck rotation to read far corners | Center status metrics or trigger at cursor position |
| Mixed Multi-Monitor Desk | Differing resolutions and scaling ratios | Icon order scrambling upon disconnect | Zero-clutter baseline scales identically across all screens |
Notice how a zero-clutter policy provides the universal antidote to display shifts. When you only display your battery, your network status, and your clock, there are no extra icons to scramble, no overflow behind the notch, and no visual clutter pulling your attention. If you also run background monitoring tools, our guide on consolidating background system monitors into a single tray demonstrates how to tuck complex hardware sensors into a single unified menu.
Ergonomic Solutions for Ultrawide Displays
For users who spend their primary working hours on expansive panoramic screens, three specific ergonomics adjustments eliminate visual strain entirely:
Adjustment 1: Summoning utilities at the cursor position
Instead of forcing your eyes to travel two feet to the right corner of your ultrawide monitor to click an audio switcher or calendar widget, utilize utilities that summon pop-over menus directly at your mouse cursor. Modern window managers and command hubs can spawn status panels wherever your cursor rests, eliminating neck movement completely.
Adjustment 2: Centering the active application canvas
Never stretch a single application window across the entire width of an ultrawide screen. Reading a sentence that spans thirty-four inches requires turning your head back and forth like watching a tennis match. Keep your primary text editor or code workspace centered in the middle twelve hundred pixels of your screen, and let the outer margins remain completely calm and uncluttered.
Adjustment 3: Standardizing font scaling across connected panels
Ensure that your menu bar font size remains comfortable across different screen pixel densities. If your external display uses low pixel scaling, tiny status icons force you to squint and lean forward in your chair. Matching the apparent physical size of icons between your laptop and external monitor ensures consistent visual comfort.
The Tennis Match Syndrome: Why Rapid Head Rotation Destroys Flow
To appreciate why panoramic screens require strict visual discipline, imagine sitting in the front row at a championship tennis match. To watch the game, your head must continuously pivot forty-five degrees to the left to watch the server, and then snap forty-five degrees to the right to watch the receiver return the ball. Back and forth your neck swivels, tracking the bright yellow ball. After two sets, your neck muscles ache, your eyes feel gritty, and your attention is thoroughly scrambled.
Working on a poorly organized thirty-four-inch or forty-nine-inch ultrawide monitor creates the exact same physical strain. If your application menu sits on the far left edge of the display and your system status indicators sit on the far right edge, your neck becomes a tennis spectator. Every time you check an icon or open a menu item, you pivot your cervical spine and break your eye convergence.
Ergonomics experts recommend keeping your primary work within a central thirty-degree visual cone. By stripping away peripheral menu bar clutter and relying on centered application windows, your head remains completely steady. Your neck muscles relax, and your eyes remain locked on your creative output without suffering from tennis match fatigue.
Frequently Asked Questions
Can I display the menu bar only on my primary monitor?
Yes. In macOS Desktop and Dock settings, you can toggle “Displays have separate Spaces”. When disabled, the menu bar appears only on your designated primary display, leaving secondary screens completely free of top-edge distractions.
Why does the menu bar autohide behave differently on ultrawide monitors?
When menu bar auto-hiding is enabled on an ultrawide display, the bar slides out of sight completely until you push your mouse to the very top edge. This creates an expansive, borderless workspace ideal for immersion, though you must train yourself to rely on keyboard shortcuts for the time and battery status.
What is the best way to prevent icons from jumping around when docking?
Using a dedicated menu bar manager locks icon positions in place. The manager enforces your designated sorting rules regardless of whether you are running on internal laptop panels or external high-resolution displays.
Achieving a zero-clutter menu bar across diverse displays is the ultimate expression of digital craftsmanship. By respecting the physical boundaries of portable screens and the ergonomic realities of ultrawide monitors, you build a tranquil, adaptive workstation that supports your focus wherever your work takes you.